PPC Linux for FX12 FPGAs
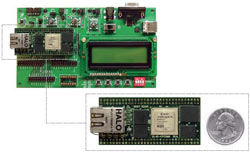
The custom Linux kernel for VL2 is based on Linux 2.6.24-rc8-xlnx for PowerPC 405 CPUs. This kernel will boot on any FX12 mini module such as the one shown on the left, and it is likely to be useful for other FX12-based projects. The kernel supports the on board Ethernet hardware because it includes the local link TEMAC driver from Xilinx (xps_ll_temac). All of the other mini module hardware is also supported.
Beyond the Xilinx patches, further modifications have been applied in-house for the following reasons:
- Changing the configuration to add the FX12 board using the Xilinx ML405 board as a base.
- Supporting the Flash memory on the FX12 board and partition it into two spaces.
- Boot from an "initrd" rather than a real filesystem.
- Add boot loader code to support booting from Flash.
- Add JTAG programming drivers and "open firmware" support in Xilinx GPIO.
- Add Teaport UART support to the kernel; Teaport is a custom high-speed UART design with a large FIFO.
Here is some more information about the changes to the Linux kernel. The kernel source comes from git.xilinx.com. You can find the modified kernel on the downloads page.
Preparing to Build the Kernel
You need a Linux PC to build the kernel. The build process works correctly on the Etch release of i386 Debian GNU/Linux and on the 2008 staff Linux system used in the Computer Science Department. Your mileage may vary on other types of Linux. Don't attempt to build the software on other OSs, this is a waste of your time.
To build the Linux kernel, unpack the fx12-linux-software.zip archive from the downloads page. Unpack the xilinx-linux-2.6-DDMMYY.tar.bz2 file. Then, if you have made changes to the hardware, copy the DTS file produced by EDK (using the gen-mhs-devtree "fdt" OS target) to arch/powerpc/boot/dts/.
Then build the GNU toolchains and root filesystem tools using the build-buildroot script. This may pause when it reaches certain configuration options; just press Enter if this happens.
Once this completes, it produces a buildroot directory and creates links to root and toolchain. When these exist, you are ready to begin the kernel build.
Building the Kernel
Run build-kernel to start the kernel build. The kernel archive already includes a correct .config file; you do not need to change this. Running build-kernel also builds the root filesystem, which is automatically compressed and included in both of the output files:
- zImage.bin - binary image of kernel and root filesystem, for loading into Flash memory.
- zImage.hex - Intel Hex image of kernel and root filesystem, to be sent to the boot loader when the Flash memory is empty or when the kernel in Flash will not boot.
If you want to use the GNU compiler tools manually, you should enter the following command from the fx12-linux-software directory:
export PATH=`pwd`/toolchain/bin:$PATH
If you want to disassemble the kernel binaries, you can look at two intermediate output files using the powerpc-linux-objdump tool. These are:
- zImage.initrd.elf - ELF image of kernel and root filesystem, contains the Linux loader. (The actual kernel is decompressed by the loader.)
- vmlinux - ELF image of kernel, uncompressed.
The root filesystem was originally generated by the buildroot tool which is also included in the source repository. The files created by buildroot have been placed in the root subdirectory. Some of these files need to be changed to configure the network and start VL2 on bootup: the changed files have been placed in the local subdirectory so that buildroot can be executed again without disabling VL2.
Both local and root are processed by genromfs to produce ramdisk.image, which is an uncompressed read-only root filesystem in romfs format. genromfs is executed automatically by build-kernel. fx12-devices.txt is used to populate the /dev directory with device nodes. The image is compressed using gzip before it is added to zImage.bin.
Making Changes and Testing Them
You might want to make changes to the root filesystem. If you do, then you should put the changed files in local and rerun build-kernel. You might also want to make changes to the kernel source code. If you do, then you should run build-kernel to compile them.
In either case, you can test your changes by:
- Copying zImage.bin to the Flash memory and rebooting. This is a good option if you are sure your changes will work, because it is fast. If your changes don't work, the system might not boot any more. You'll be forced to load zImage.hex using the boot loader.
- Sending zImage.hex to the boot loader. This takes a long time but doesn't affect the Flash memory at all, so it is a safe but slow option.
There isn't room in the Flash memory for more than one kernel and root filesystem, so there is no way to store a "last known good" configuration. Be careful! If things go wrong, you can always recover using the boot loader. As a third option, you might be able to use the Linux kexec facility to boot a new kernel from memory; this is untested.
JTAG Drivers
The custom Linux kernel includes a fast JTAG programming driver that can send a bit stream in serial form via the TDI pin, clocking TCK for each bit. There is one restriction: the bit stream must be composed of a whole number of bits. This driver is used to send the bulk of each bit file.
The JTAG host interface on the FX12 is composed of two GPIOs. The driver source code for all Xilinx GPIOs is found in:
fx12-linux-software/linux-2.6-xlnx/drivers/char/xilinx_gpio/
where the xgpio_ioctl.h header defines the ioctl interface for GPIO commands: read input, set output, and set three-state. These commands are executed on the /dev/gpio device.
In this custom version of the Linux kernel, an extra command has been added: XGPIO_CONFIGURE_JTAG. This is used to set up the JTAG programming driver. An example of its usage appears in jtag.c in JTAG_Set_Frequency. It tells the kernel driver which pins should be used for TDI and TCK, and allows the programming frequency to be set. Once configuration has been performed, it is possible to use the write system call on the /dev/gpio device to write bit file data in bulk. This is faster than sending each bit using ioctl because fewer system calls are required. (The difference is at least two orders of magnitude.) An example of write is found in JTAG_Send_Bit_Lump: notice that the final byte is sent using ioctl so that TMS can be asserted for the last bit.
An alternative implementation of fast programming functionality would have put the XSVF player code in the kernel, but this could have created a licensing conflict (Xilinx versus GPL) and might also have introduced security problems (the Xilinx XSVF player was not designed to be included in a kernel: is XSVF file interpretation "safe"?). Therefore, only the bare minimum functionality has been placed in the kernel. The other JTAG functions are relatively rare and do not require high speed operation.